Getting Started
- Purchase the Plugin
- Install the Plugin
- Enable Play Services Saved Games Plugin
- Set up Play Games Services
- Enable Saved Games
- Add Snapshot Support
- Ensure the Unreal Engine Online Subsystem Google plugin is enabled.
- Navigate to <YOUR_UNREAL_ENGINE_5.4_INSTALLATION>\Engine\Config\BaseEngine.ini
- Open this file and locate the line [OnlineSubsystemGoogle.OnlineIdentityGoogle] line
- Below this line put +ScopeFields="https://www.googleapis.com/auth/drive.appdata"
- Login to Google Play Services
Purchase the plugin on the Official Unreal Engine Marketplace.
In the Epic Games Launcher, the plugin will appear in your Library. Go to the Library tab and find the plugin and add it to the engine.
In Unreal Engine, the plugin will be available in the plugins section. Go to Settings -> Plugins -> Search for "Play Services Saved Games" and ensure it is enabled.

Follow Google's documentation to make sure you have setup Play Games Services. A Guide on how to do so can be found here.
NOTE: When the documentation speaks about using your SHA1 fingerprint for your Android credential, make sure you use the one generated for you in the Google Play Console. You can find the correct one by navigating into your application within the Google Play Console and in the left navigation menu, go to "Test and Release" / "Setup" / "App Signing".
Make sure to use the "App Signing Key Certificate" SHA-1 fingerprint
In the Google Play Console, select your applicaiton and then in the left navigation menu, navigate to "Grow users" / "Play Games Services" / "Setup and management" / "Configuration". Select "Edit properties" and turn the Saved Games option to ON.
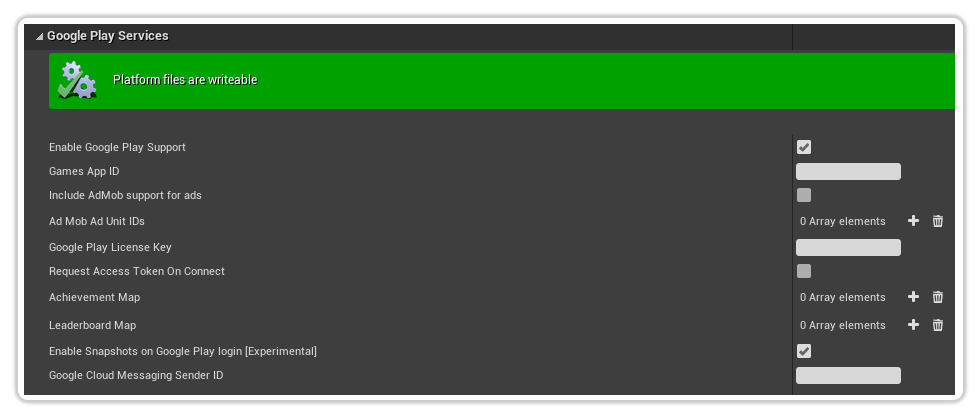
Enable "Google Play Support", "Snapshot Support on Google Play Login" and ensure your "Games App ID" is set appropriately for your app. Go to Project Settings -> Android -> Google Play Services and enable: "Enable Google Play Support" and "Enable Snapshots on Google Play login".

NOTE Unreal Engine 5.4 and above:
With the release of Unreal Engine 5.5 (and since then 5.4), they removed the "Enable Snapshot Support" checkbox in the Project Settings. As a result, you will have to do it manually yourself as follows:

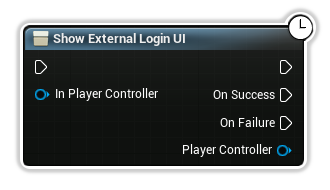
On Game startup, add the Unreal Engine provided node (not provided by this plugin) to login to Google Play Services. The node is called "Show External Login UI".
